


You are probably thinking that our handyman magically decluttered the closet. He would rather take the saw, cut some lumber, and make something to mitigate the issue than spending a few minutes of his precious time in decluttering. Organizing is Dear Mom’s department. This time, Dear Dad came up with a wall mounted coat rack with knobs. The rack has five knobs to hold five items. Further details on the DIY procedure of a wall mounted coat rack are provided below.
Items required for a wall mounted coat rack
The items for a wall mounted coat rack DIY project are easily available. Some Amazon affiliate links are provided in this article to help readers realize what items I am referring to. We will receive an incentive from Amazon if you use any of the links to purchase anything, with no additional cost at your end.
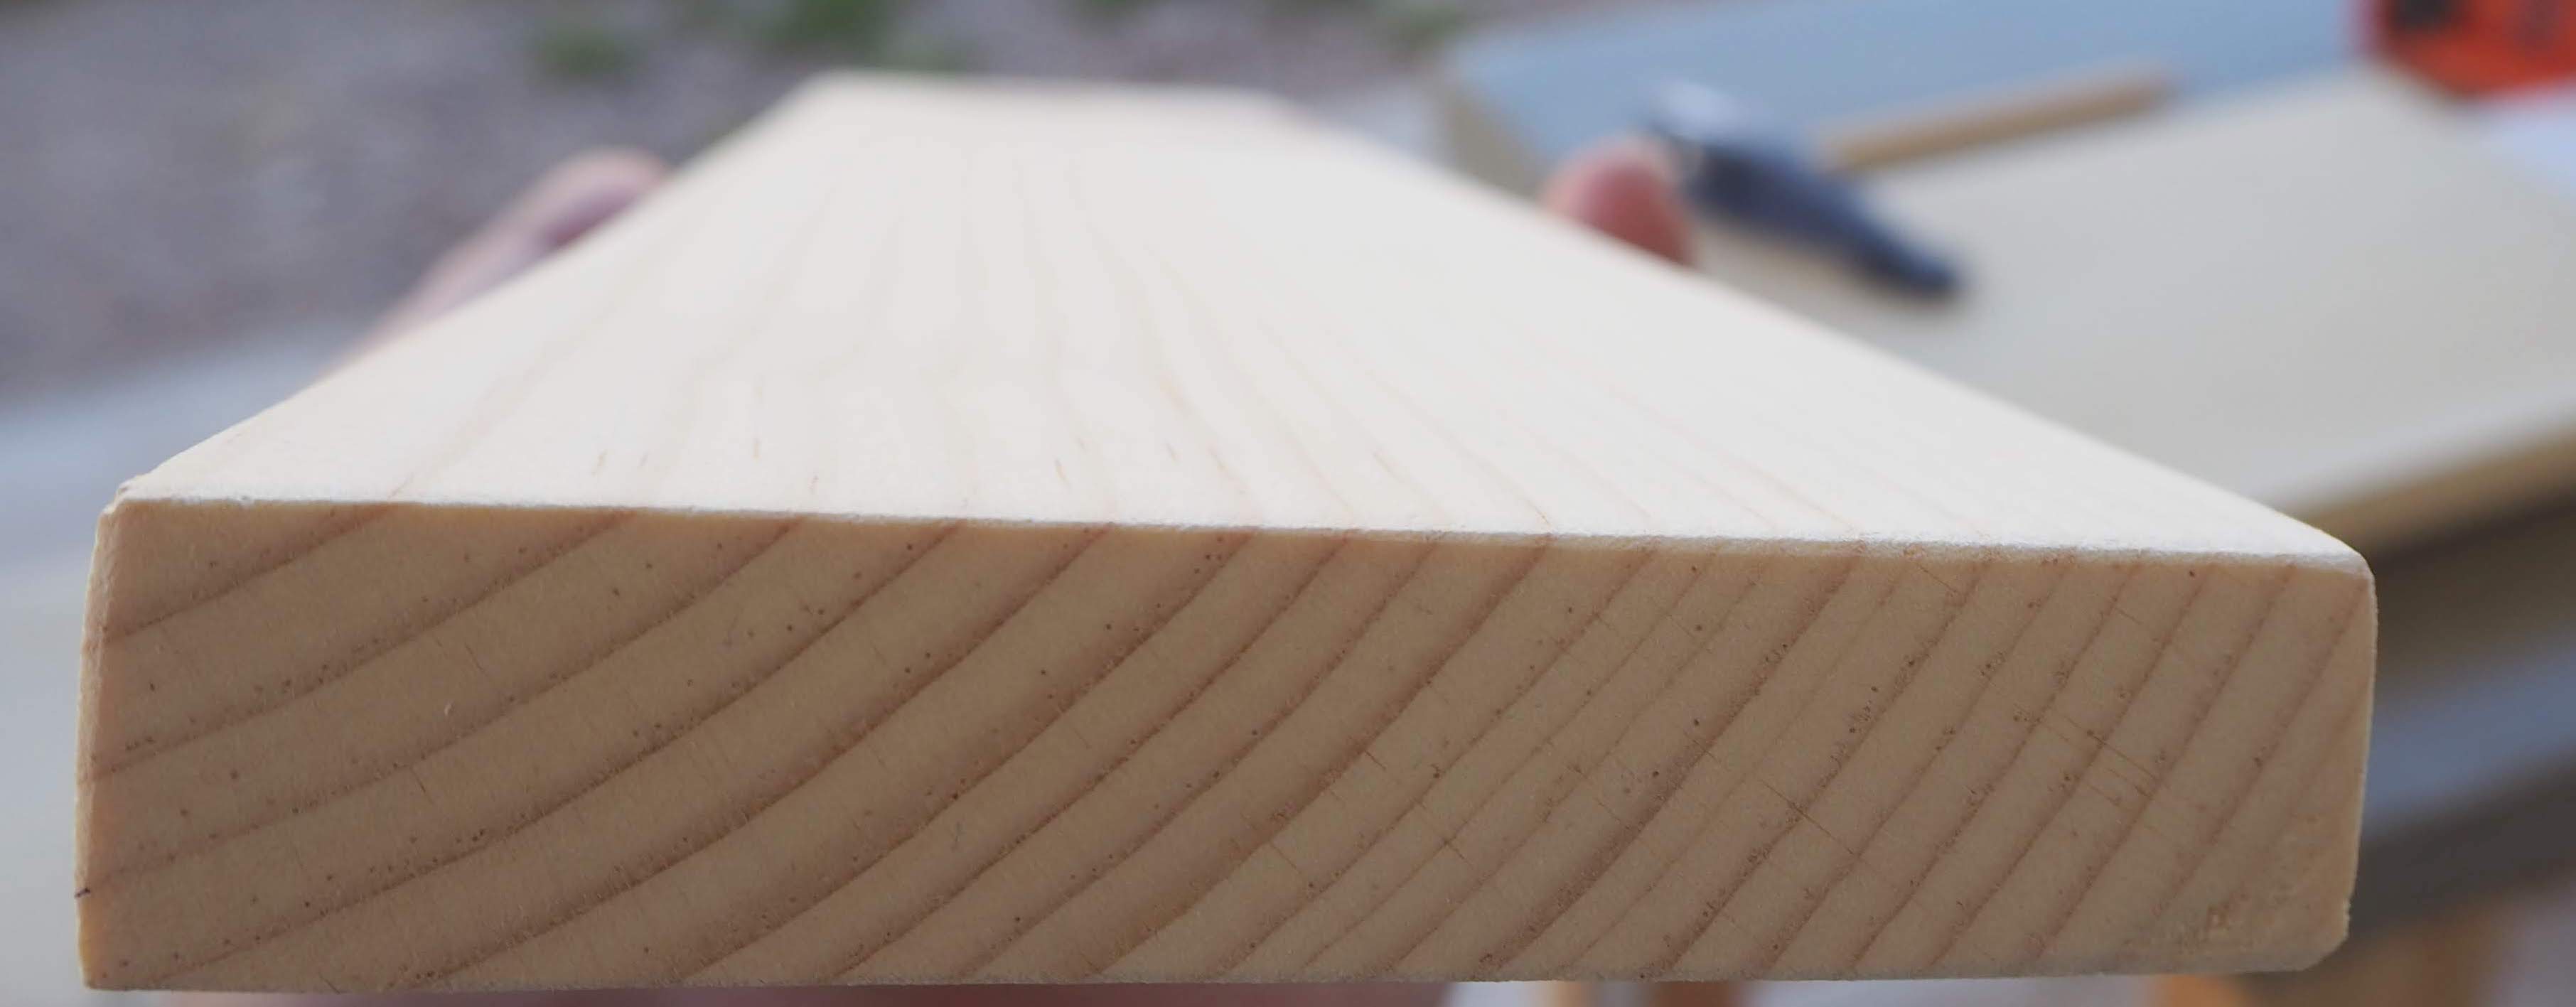
Wood piece: The size depends on where you want to mount the rack. What matters most is the thickness of the wood. Handyman used a 0.75-inch thick wood board. The original board was 7.6-inch wide and 6 ft tall. Home Depot has many different types of wood boards. When you purchase a wood board, special care should be taken regarding the size. In our experience, the actual dimensions are smaller than the dimensions written on the wood boards. For example, a 1″x8″x6′ board has a size of 0.75″x7.6″x6′.
Knobs or hooks: We used wooden cabinet knobs for this project. The reason is — the grains of the wooden knobs matched well with the woodgrains of the wood board. You can use hooks as well. Home Depot has a good collection of knobs and hooks. Required screws generally come with the knob or the hook.
Acrylic paint: We used white acrylic paint. I think, leaving the project unfinished is fine because the woodgrains give a gorgeous look.
Screws: You will need some screws to mount the wood board on the wall. If your board is 0.75 inch, you need screws that are at lease 1.5-inch long. If you cannot find a stud where you want to put the rack, then you will need some plastic expansions
Tools required for a wall mounted coat rack
The list above provides the items that are required for the rack itself. You will need some tools to cut, paint, and finish the project. We used the following tools.
- Circular saw: We used a circular saw to cut the base of the rack from the large wood board. A circular saw is a tool that can make wood-cutting quite a fast job. For small projects, you can use a handsaw. Our handyman sometimes uses the handsaw because it requires lesser maneuvering than a circular saw and he feels safer with the handsaw.
- Random orbit sander: A random orbit sander is a great tool to smoothen the wood. Our handyman extensively uses it to sand almost all wood projects. Our previous article on “Sanding tips for home woodworking” provides more details on sanding.
- Drill driver: A good drill driver and set of drill bits are required for most woodworking projects. The project we are describing needs drilling.
- Screw driver: If you have a drill driver, then you just need to make sure that you have bits for the screws you will use to mount the rack on the wall.
- Stud finder: A stud finder will help you find a strong wood inside the wall which can hold the drilled screws.
- Paint brush:Our handyman always keeps a set of paint brush in his supplies. A good set of paint burshes is essential for smooth painting. We do not want the brush to release hair and make the painting look unprofessional.
- Scale:A regular 1-ft scale is sufficient for the project explained in this article.
- Pencil:Handyman used a pencil to draw lines and mark the places where the knobs should be attached. Dear Son has plenty of pencils that he generously shares with his dad.
Steps to make a wall mounted coat rack
The entire process of making the wooden wall mounted coat rack is explained below. Hopefully the pictures are helpful enough.
Cut the wood
Handyman used the circular saw to cut the wood board. The original lumber was 0.75″x7.6″x6′. For the project under discussion, our handyman cut a 0.75″x3.5″x18″ piece.
Handling a circular saw is a bit nerve-wracking. This is why our handyman cuts pieces for multiple woodworking projects in one session so that he does not have to use the circular saw too frequently.
Mark using the scale and pencil
Handyman used a scale and a pencil to draw lines and put marks where he would drill holes for the screws of the knobs. We decided that there will be five knobs and the knobs should be placed on two parallel lines.
Out of five knobs, three should be on one line. Two knobs should be on the second line. Each knob in the second line should be placed in the middle of two knobs of the first line. Handyman did the measurements and marked the wood board as shown in the picture below.
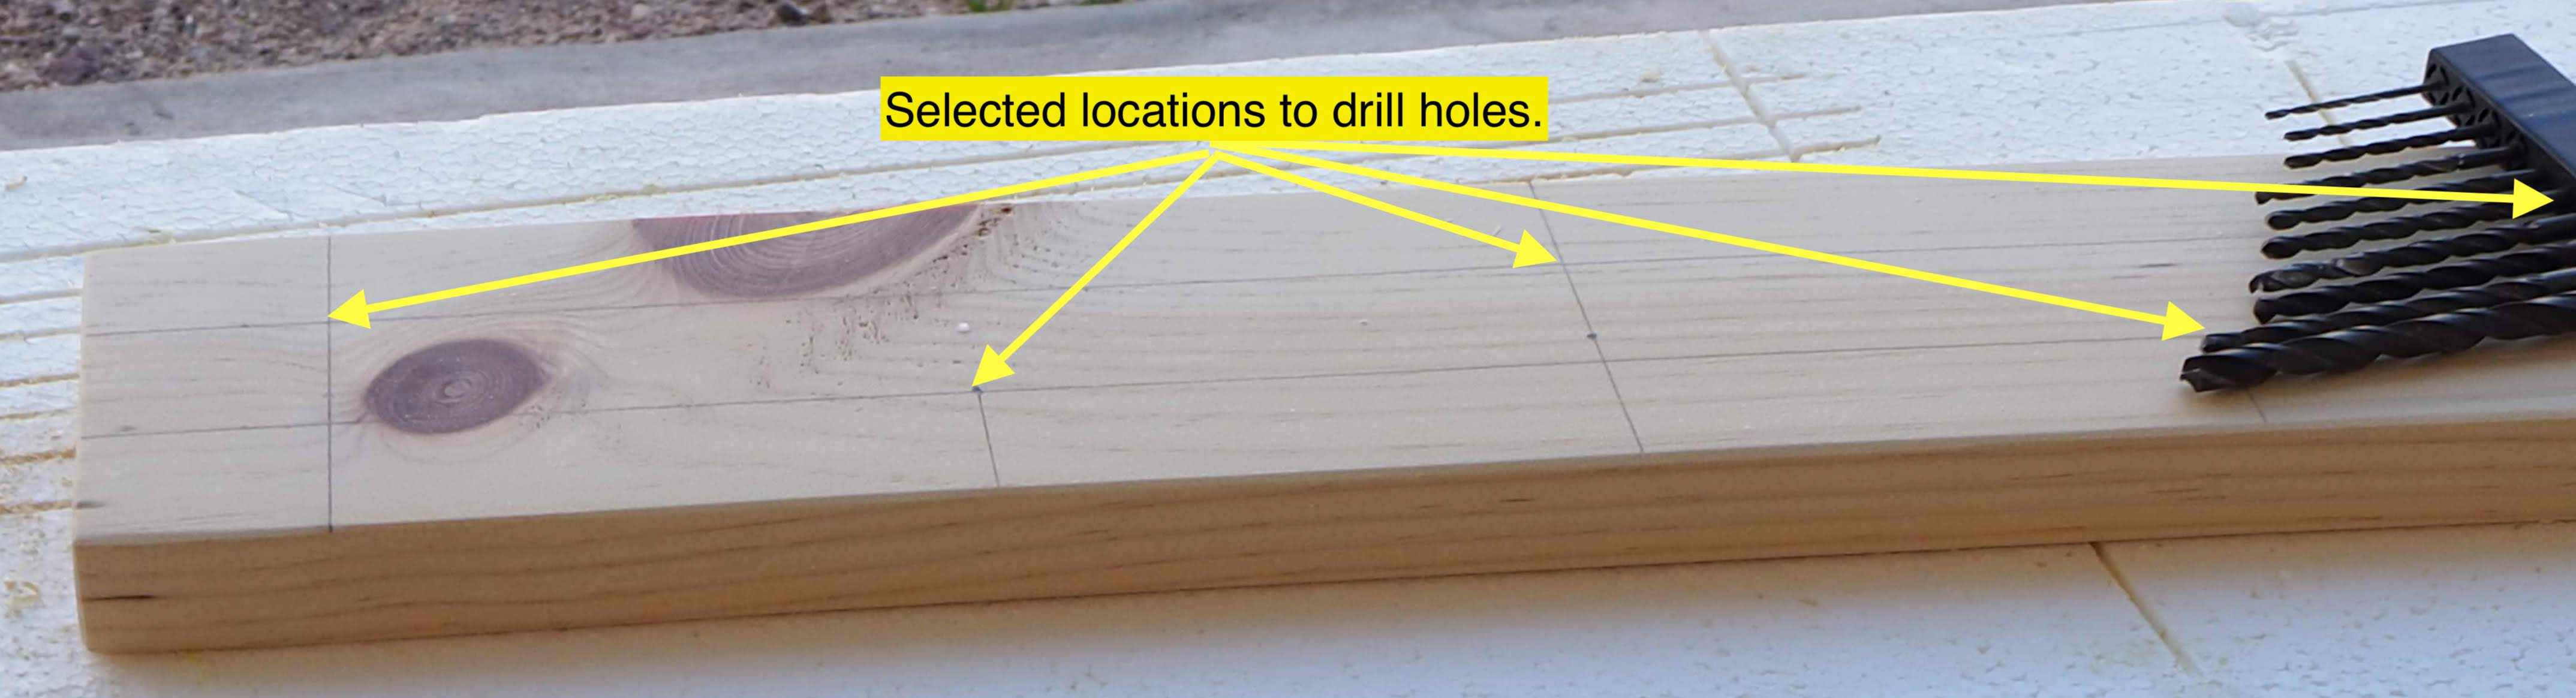
Depending on your requirements, make a design and put marks on the wood board before drilling. Marking the locations for drilling reduces the chances of unaligned holes on the board.
Make holes
Who knew drilling holes on a wood board is an art! 🙂 Screws may have two types of heads — flathead and roundhead. The screws that came with the knobs were roundhead screws. The knobs we purchased were cabinet-knobs. Generally, screws for cabinet-knobs are round because they are easy to unscrew or screw.
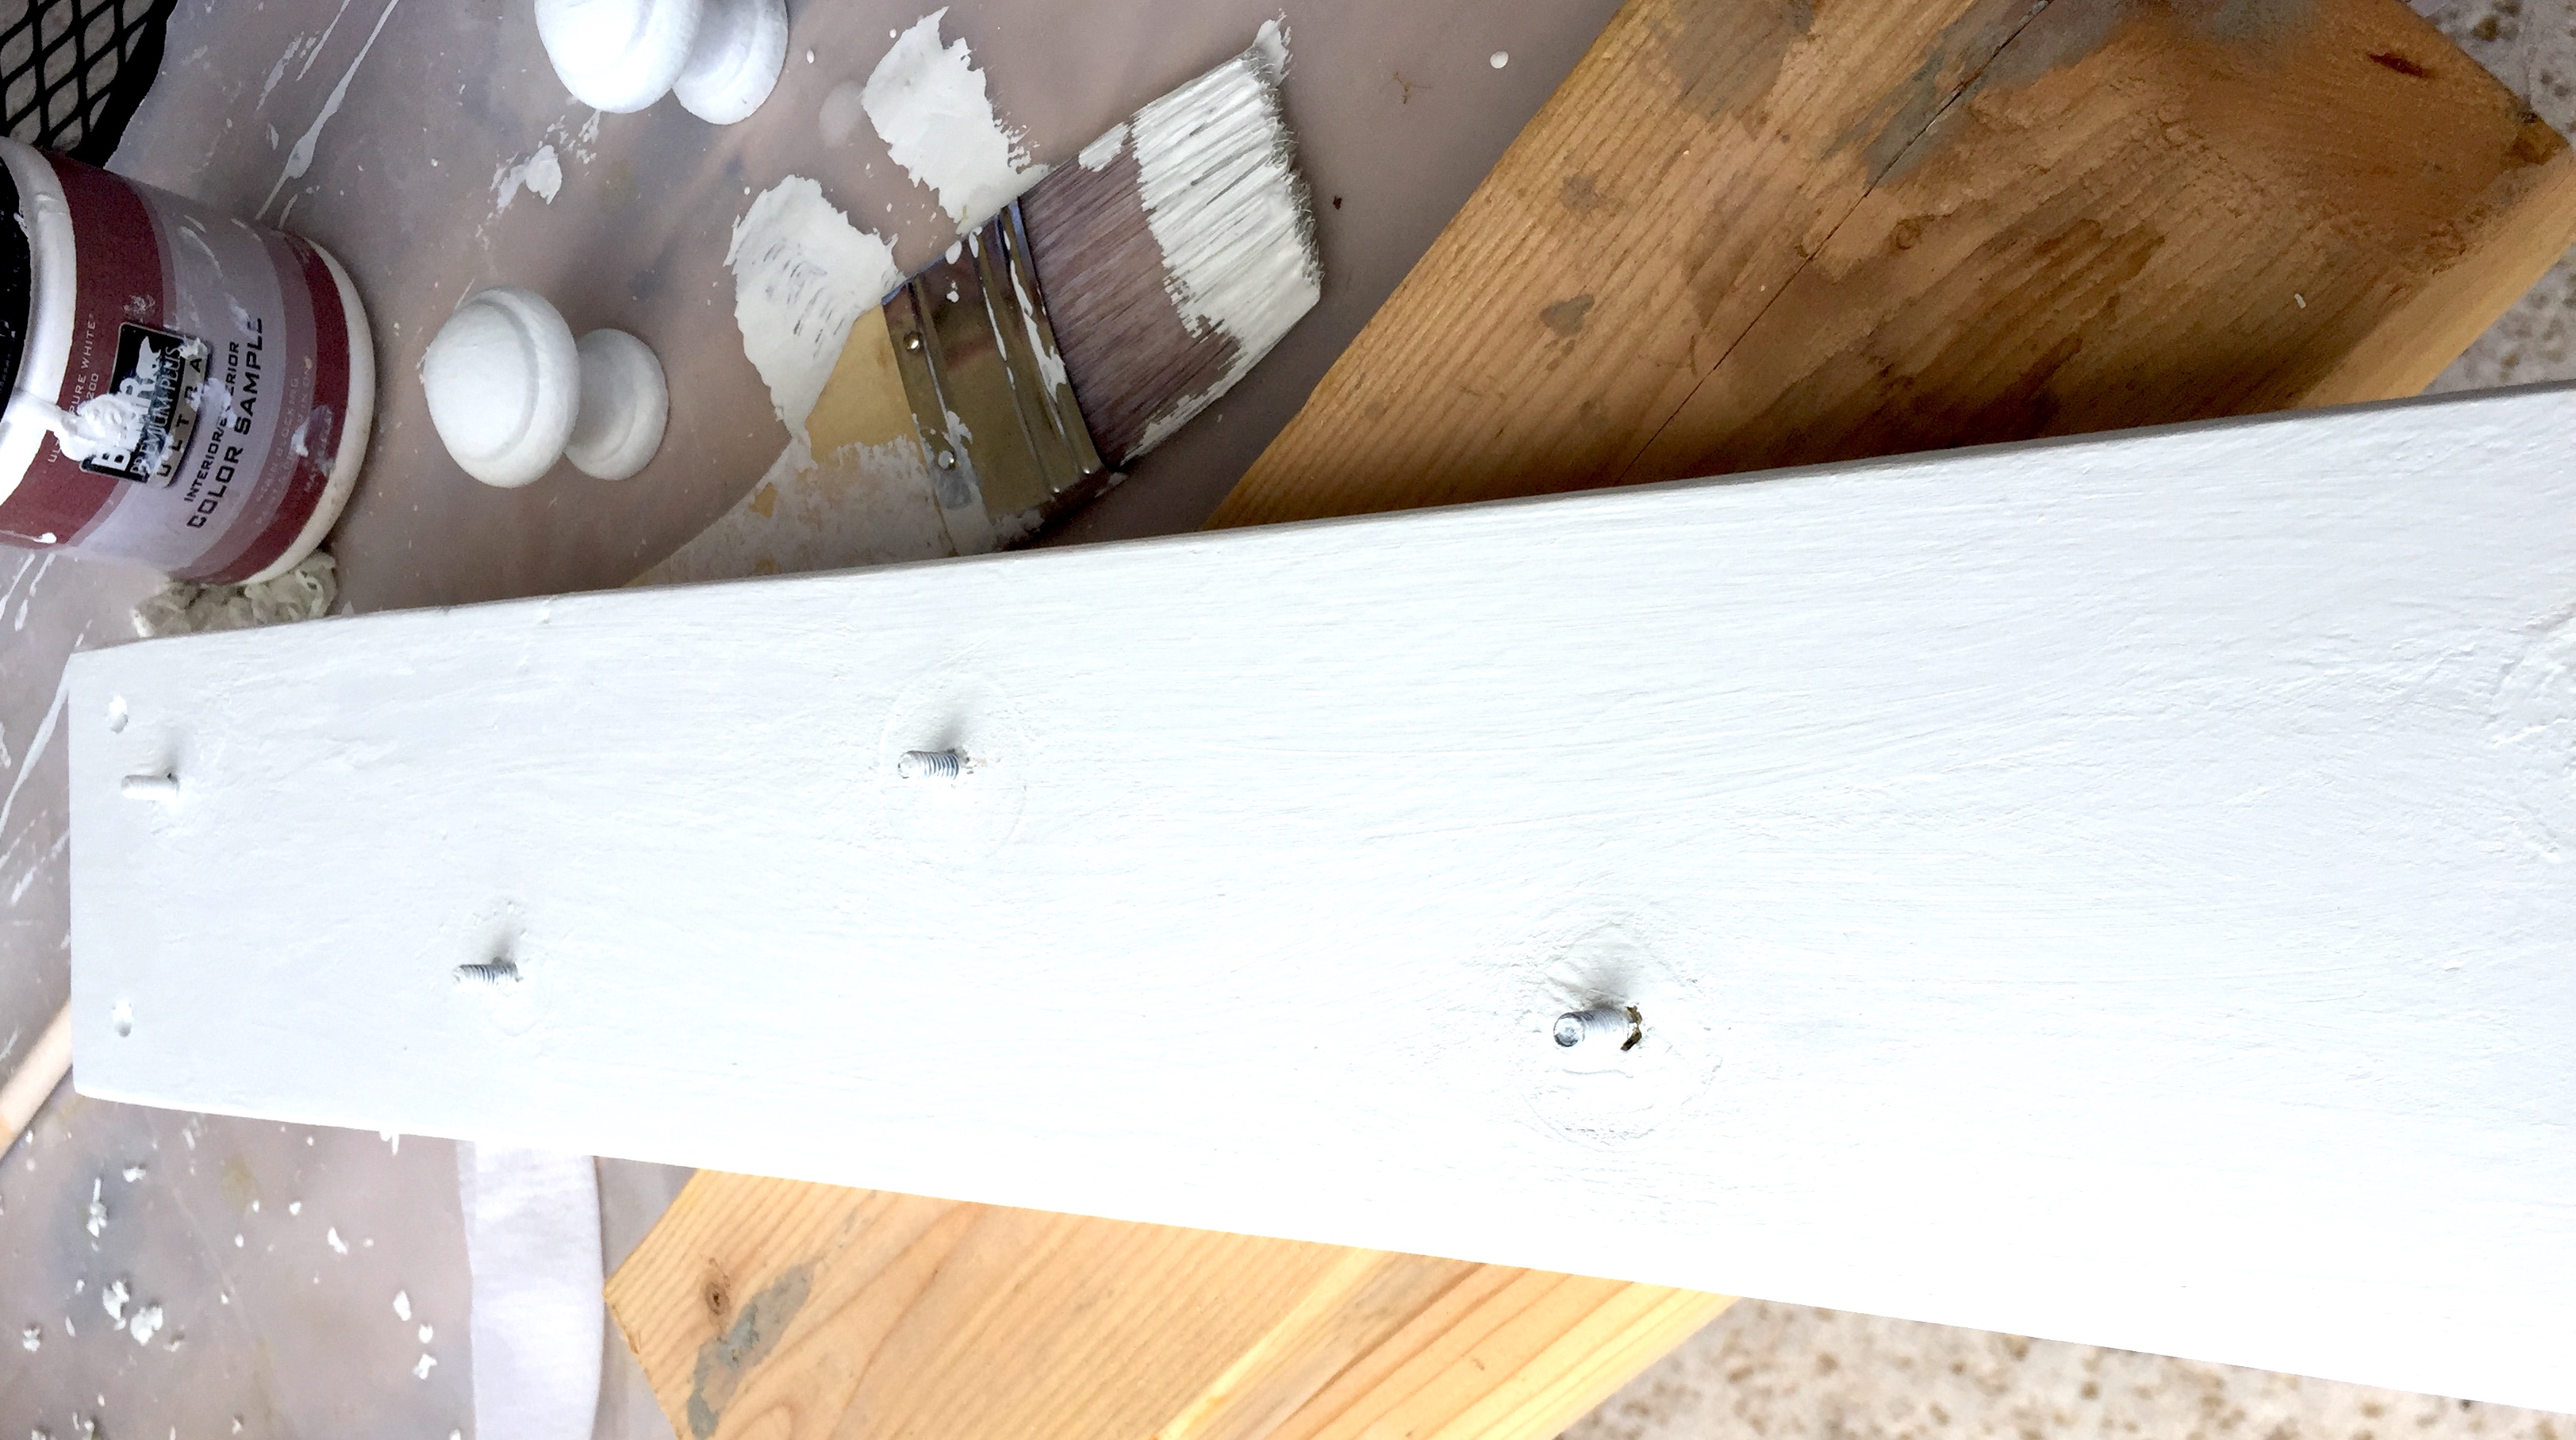
In our case, the side of the wood board that had the screw heads would be attached to the wall later. If the round heads of the screws remained outside the surface of the wood board, the attachment with the wall will be wobbly.
The solution is — after drilling with an appropriate sized bit for the screw, we used a larger bit to dig a small 2 mm hole on the same spot. The 2mm hole is where the screw head will rest and hide below the surface.
I hope the following gif animation presents the process of creating a hole well enough for reproducibility.
Paint
We painted the entire wood board and the knobs using white acrylic color. The purpose was to match the color of the coat rack with the color of the wall.
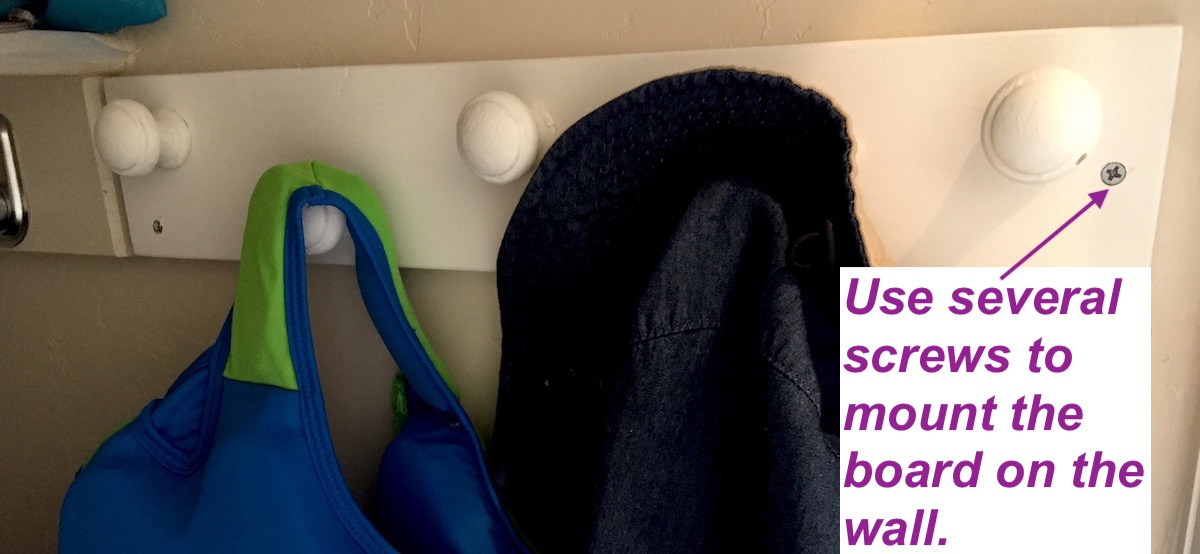
Mount on the wall
The final step is to mount the board on the wall. Predrill the board and the wall. If you cannot find a stud using the stud-finder, push some plastic extensions on the wall to make sure that the wall can securely hold the screws. Drill screws to mount the wood board on the wall. You are done. Hang scarfs, hats, bags, or coats on the knobs and enjoy.
What will our handyman do differently if he does it again?
Our handyman says that he will avoid using acrylic paints on wood. The reason is — acrylic paint hides the beautiful wood grain. Instead of using acrylic color, he will use some bright stains or something that is ink-like that will not cover the gorgeous wood patterns.
A second item to try next time is — hooks instead of knobs. A hook holds a coat or a hat better than a knob. The idea of knob popped up because it was made of wood and we expected that the wooden knob would look good on a wood board. We ended up painting the project that hid all the wood, anyway. Probably, we could use hooks — something to keep in mind for next time.
Colncluding remarks regarding DIY
If you are already into DIY, you know how satisfying completion of a DIY project can be. It is not only a money-saving effort but also an attempt to have a good family time building something.
From a Family Blog: Settle in El Paso
Other relevant articles on woodworking


Subscribe to receive notifications on our new posts.
very useful 🙂
Glad to know that you liked it. Have a wonderful week.
Definitely a worthy task!
Haha ? we are enjoying the benefits of a few more woodworking projects. I hope to write about them in the future. Always a pleasure to see your comments. Wish you and your family a great week ahead.