We had been desiring to make a wooden tray for quite some time. Just like any do-it-yourself project, we learned a lot on our way of building the project. Making things is so much fun! Making a tray can be very simple. We hoped to give the project an amateur look and a farmhouse style. By the way, we are amateur DIYers. Therefore, we will not be able to give a professional look to the project even if we want to. 🙁
The post contains affiliate links. We will receive an incentive if you use the affiliate links to purchase anything with no extra cost from your side.
Getting the wood
This step was quite easy because we were looking for a cheap and thin wood board and we found one in Home Depot. It was a half inch thick, six inches wide, and six feet long wood piece. What was the price? Two dollars and some cents. It was a cheap wood board. The wood was not even dried well. The smell of the wood was great. Name of the tree from which it was cut was unknown. I guess stores do not label cheap lumber with the name of the tree because they may come from any type of trees.
Preparing the pieces
We used a circular saw to cut the board to pieces. Our power saw is a Craftsman 12A 7-1/4″ Circular Saw, which works pretty well and the price is descent too. We drew lines where we will make the cuts and then used the circular saw. Using the circular saw is sometimes intimidating, especially if you do not have any experience in using it. Neither of us had that experience but we had the ambition of using it.
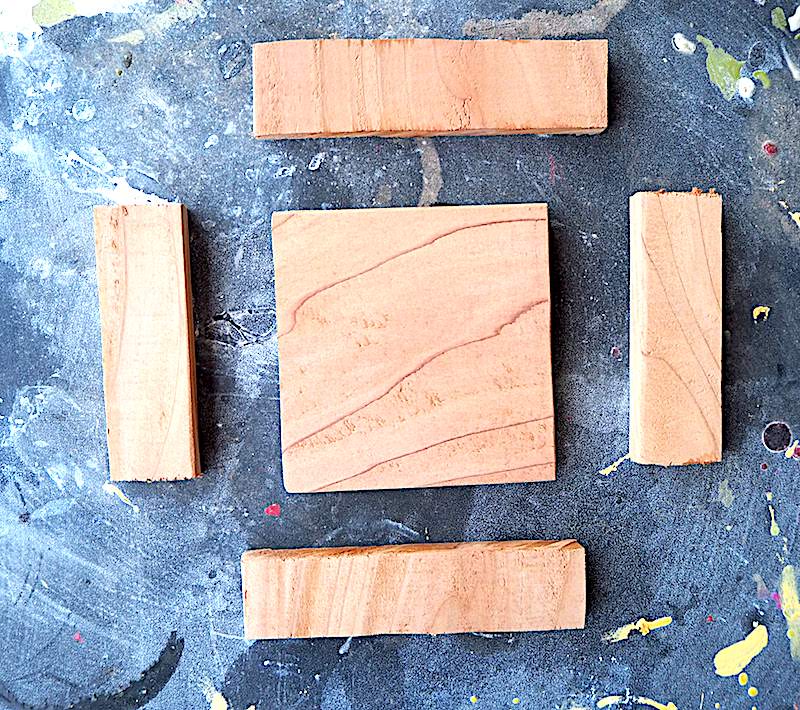
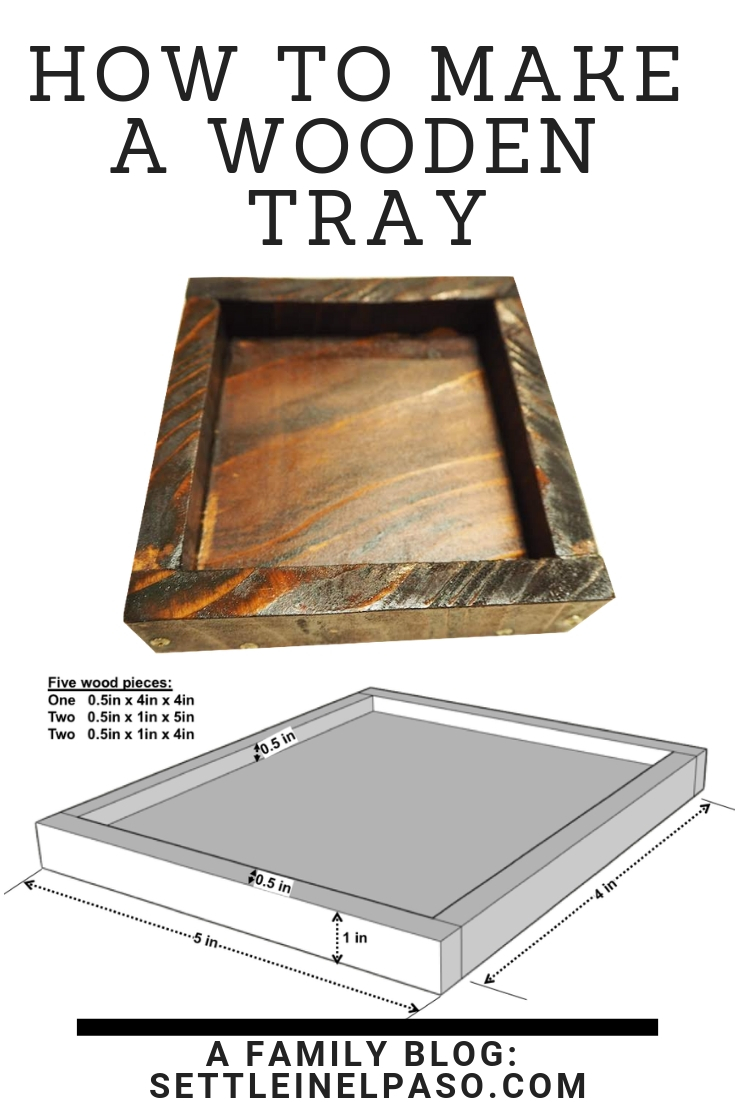
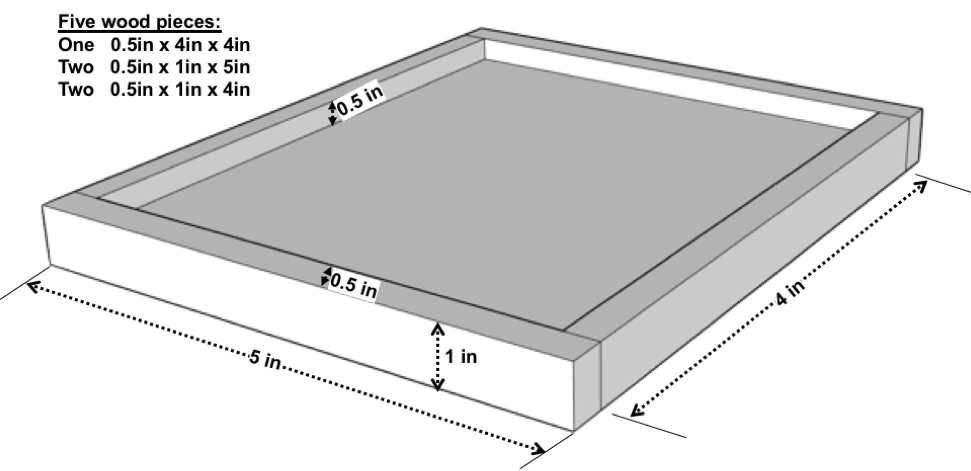
Wood pieces:
We would like to make a small tray out of these pieces of wood.
The pieces came out fine except for some rough edges. A rough cut is not a major problem because we have a
random orbit sander. Unlike a circular saw, the sander is not scary at all.

Sanding is fun. After sanding the wood pieces with a 80 grit sandpaper, the wood pieces had a descent smoothness good enough for a farmhouse style. We could use 120 grit, 220 grit, or much higher grit sandpapers for a finer finish. Yes, we have already studied a thing or two from the internet. (Just in case we are stating the obvious and you are laughing.)
Gluing it all together
Now that we have the pieces sanded, we can build the tray by putting them together. Putting the pieces together can be done in many mysterious ways. Well … not in
mysterious ways. I just wanted to use the word
mysterious because joining wood-boards is still a mystery to us. They say,
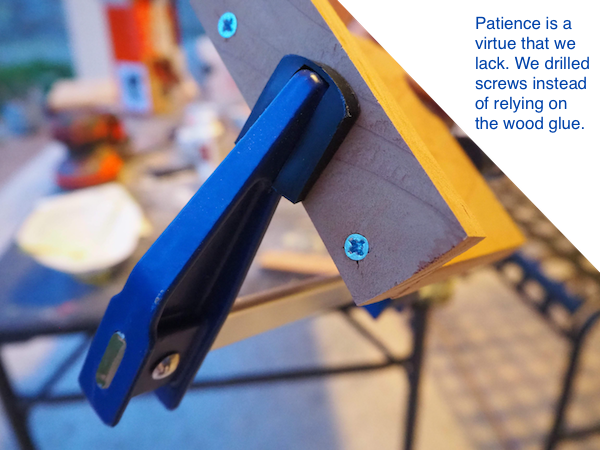
wood glue is harder than the wood itself when the glue is completely cured. Probably it is but we are still skeptics about wood glue. After applying glue, we still like to drill screws.
Dear Dad is one step ahead — he drills screws even before the glue is cured completely. He thinks it is easier to drill screws when the glue is being cured. The screws will probably not do any harm but are not necessary either for such a small project.
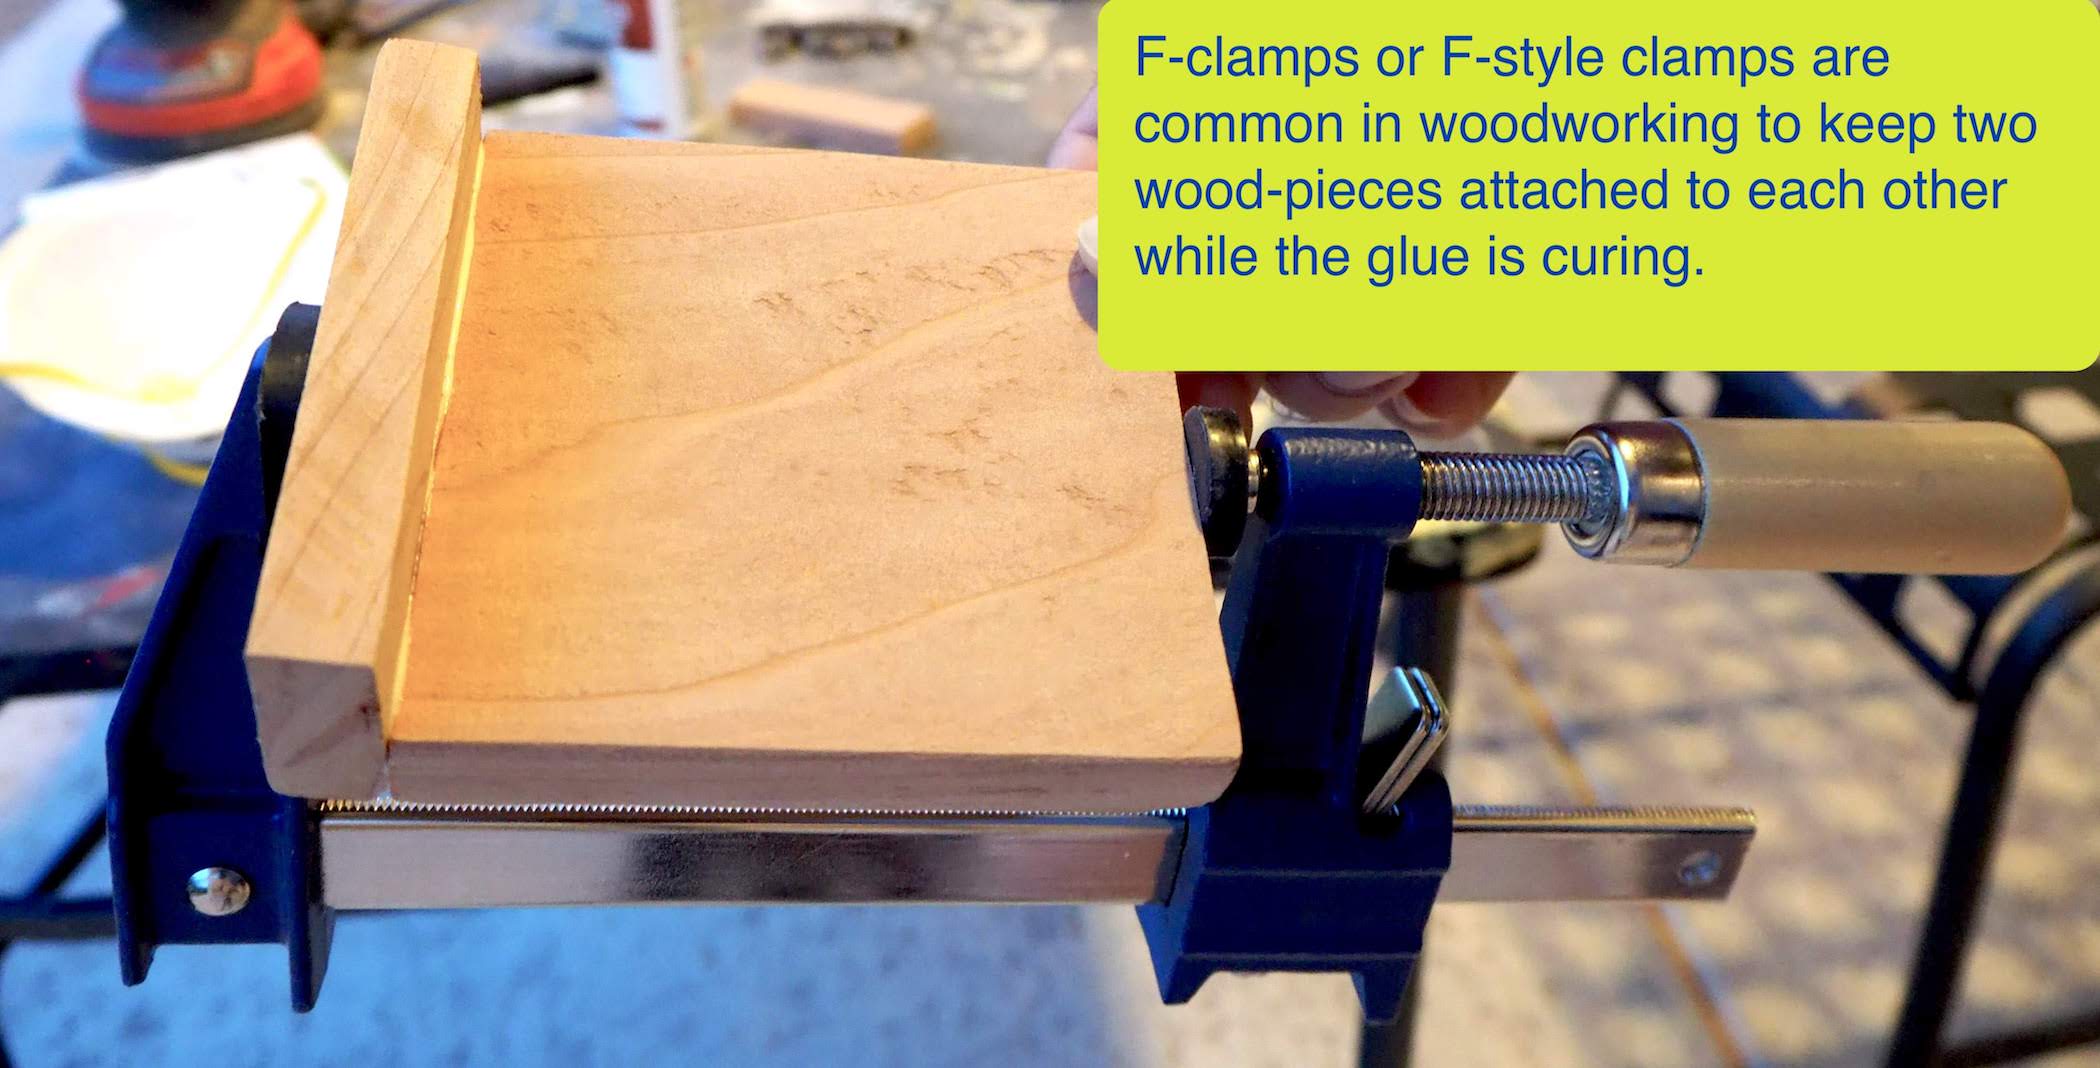
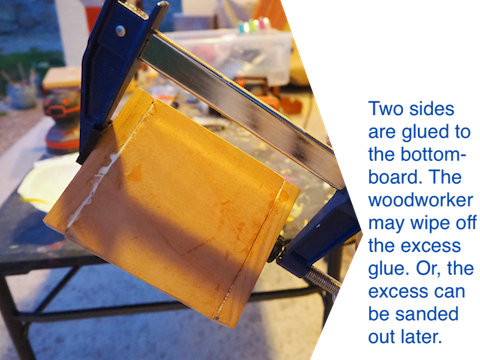
Anyway, glue or screws or both, whatever we use, we need to make sure that the wood pieces are attached to one another securely during the joining process. For this, clamps are our best friends. There are many types of woodworking clamps — we use some strong and affordable kind of
F-style bar clamps for small and medium size woodworking projects.
Woodworking frustration
Things do not go as nicely as expected in any DIY project. In woodworking, joinery and screws may cause frustrations to amateur woodworkers like us. Drilling the screws did not go well once or twice in this project.

Recovering
A great thing is — we were able to fix the cracks using the wood glue. It seems — they are right — wood-glue is indeed stronger than the wood — at least it is stronger than our kind of wood used for this project.
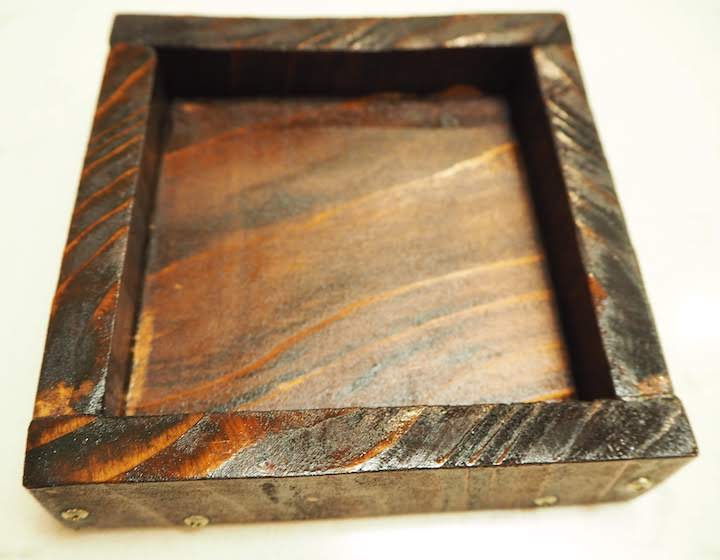
Unfinished product
We think, the tray came out great! It has the farmhouse look as we desired. Some parts were not that smooth. A little bit of more sanding gave the tray a wonderful look.

Finished product
Design
Here is the complete design and dimensions of the five pieces of wood that we used. All the pieces are cut straight without any angles that are not 90 degrees.
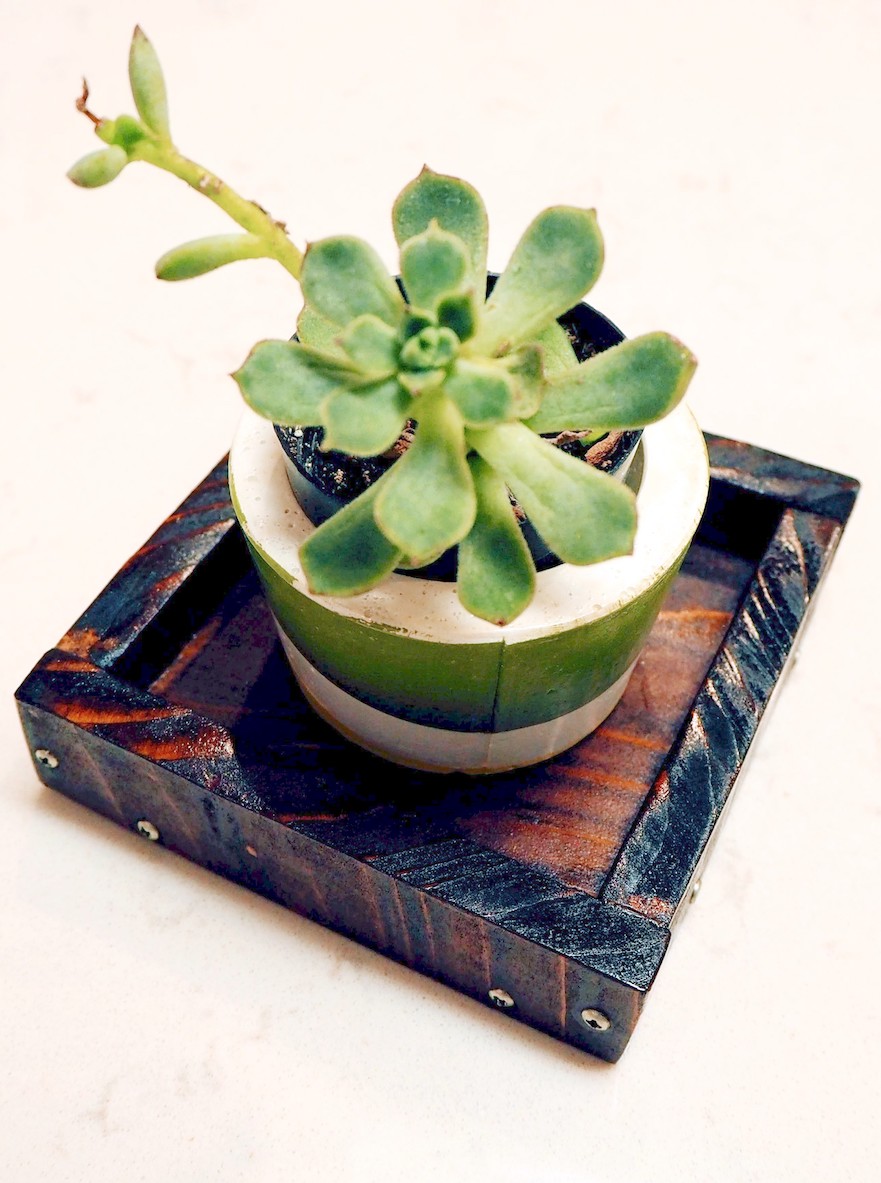
What can we use the tray for?
It is a multipurpose tray. 🙂 A few examples are — putting keys after returning home, using it to keep business cards in the office, or even use it as a coaster for a small succulent planter. After staining and sealing the tray, we sealed the joining edges of the tray using a clear 100% silicone sealant, commonly available in stores like Home Depot or Lowes. The sealant prevents water from leaking outside of the tray in case the tray gets some of the water from the planter it is holding. Here is a picture of the wooden tray with a succulent planter.
What will we do differently if we make a wooden tray again
We will do two things differently: (1) we will not use screws because wood glue is sufficient for such a small tray, (2) we will use a bright wood stain instead of a dark one. (Not that the dark one is looking bad. We would like to explore different looks including weathered ones.)
Concluding remarks
Do you like to build things? Please share with us if there is any item that you enjoy building. Or, let us know if you have any woodworking tips. We are new to the woodworking world and we are having tremendous fun. Your comments will help us and others a lot.
We hope to bring more woodworking posts on the (wooden) table. Please stay tuned by subscribing to receive notifications about our new posts.
Settle in El Paso team
Subscribe to receive notifications on our new posts.


Yes, you have rightly said that the working with circular saw is quite dangerous but I have no other option. kindly guide me about sander saw if it is better than circular saw as you have mentioned.
Looks good.
For one moment I thought you were talking about creating a wooden tree …..
Kind regards,
Haha … a tree is out of our league. Thank you for visiting and commenting. Have a wonderful week.
It’s adorable. Looks great with the plant it!
Thank you for your kind comment. I am glad to know that you liked it. Have a wonderful weekend.