


Hunting for a free photo editor to blur background
Anyway, like millions of people, I believe that whenever there is a will there is a set of internet-search results that will show me the way. In fact, there are ample photo editor software products that will allow you to change the regular background of a photo to a blurry background.
The problem with most of those software products is that …… actually the problem is not with the software products. The problem is with me. I do not like to spend too much money on software, especially in this era of yearly subscription/license.
Many times, the subscription is over before I get a chance to extensively use the software. Therefore, I am always in the hunt for free software tools and open-source packages.
Found photo editor that can blur background of a photograph
I checked a few trial photo editors that have the capability of blurring backgrounds. Among all the ones I tried, none but PhotoScape X allows to blur backgrounds flexibly and save the updated image using the trial version.
That means I can blur backgrounds of as many images as I want using the free version of PhotoScape X. The free version of this software contains a significant number of features that are usually NOT freely available in many other photo editing packages.
In addition, the free version of PhotoScape X is a *time-unlimited* free trial.
A few sample photographs with blurred backgrounds


Before and after: The stroller is clear in the photo at left.
Notice that the stroller is blurry in the photo at right.

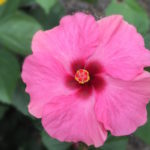
Before and after: The leaves are blurry in the photo at right.


Before and after: I wanted to draw attention away from the green-house fans and ceiling. The figure at the right side blurs away the ceiling and the fans.


Before and after: The cutie pie is the center of attention in the image at the right. Everything else is blurry.
A brief tutorial on how to blur the background of a photo using free PhotoScape X photo editor
Of course, the first step is to visit PhotoScape X and download the software.
The installation is as easy as it can be. Both Mac and Windows versions are available.
I used the Mac version for the samples of this post. How to blur the background of a photo using PhotoScape X is outlined below.
- The graphical interface has several task-groups like — Viewer, Editor, Batch, Collage, Combine, Create GIF. Make sure that the Editor tab is selected at the top row of the graphical interface.
- Drag and drop the photo you want to edit from hard drive to Photoscape X editor.
- The pane at the right side contains a menu called Adjustments. There is a plus (+) symbol to the left of it. Click on the plus symbol. This will open a list of operations. One operation is Blur (there is a water-droplet icon that appears with the label Blur). Click on the icon for Blur. Now, you have the panel you can use to blur parts of your image.
- You will find a Mask option. There is a plus symbol near the label Mask. Please click on that plus symbol. Masking tools are visible now. I like the right-most one, which is a paintbrush. Select the paintbrush.
- Once the brush is selected, you can mask anything in the image. The masked parts can then be blurred. I generally mask the part I do not want to blur. Then I check Invert Mask to invert the selections.
- After you have masked the parts that you would like to blur, you can change the Blur radius using a scroll bar. This allows the user to control how blurry the masked areas should be.
- You can press the Compare button to compare the modified photo with the original one. There is also an unmasking paintbrush to fix over-masked areas.
- Press the Apply button when you are satisfied with the changes.
- The Save As button will show up at the bottom of the interface after you press the Apply button.
- Save the new photo as a different file.
A video tutorial on how to blur background using the free version of PhotoScape X photo editor
I made a video of how I changed the regular background of a photo to a blurry background using Photoscape X. The video is provided below. It does not contain any sound (therefore, it is safe to play even when the kid is sleeping). Enjoy.
Concluding remarks
Please let me know if you know of any other freely available (time-unlimited trial) software to blur the background of photographs.
Subscribe to receive notifications on our new posts.
Thank you for your post.I hope photoscape x is a great way for photo blur. I use software in adobe photoshop for photo blur.But i am not expert in adobe photoshop.when i see your post i decide that i will use photcape x.Because photoscape blur imag looks like a beautiful.
It is also called Bokeh (blurring photo) and it is better if you have a glimmering light in the background. For easier ways use AterFocus app for Android or portrait blur for ios.
You can blur the background of your photo in two ways. By setting your camera (the depth of the field will blur the background) or using photo editing software. I can do both of these.
Photoshop is very expensive and hard to master photo editing software. You may try GIMP which is often referred as free photoshop. I have also tried photoscape and it is a good free program.
Wow! This is very interesting. I have read a few articles about photography and blurring the background image really enhances the the main photo you would like to emphasize. Just like in your photo samples. With the introduction of various apps, softwares and free version like PhotoScape X you don’t really have to be a PRO. The limited use of other apps and other related softwares are indeed disappointing as this will eventually lead you to purchase which adds up to your additional yearly subscription bills. The time unlimited feature of the free version of PhotoScape X is what interests me the most because this time I can do it for free and without any limits. Thanks for the share I will definitely try this one.
A great tutorial on how to blur the background of a photo. I’ve never tried it before so I’m not exactly sure, but isn’t it possible to always have certain things in the background blurred when you take the actual photograph? I think it is something to do with focusing on the person. I guess you can only probably do it on good smartphones or professional cameras. It just looks a lot more natural and better than editing the photo.
That’s good to know. whenever I use Photoshop, I’ve never tried to use or don’t know how to blur the background of a photo. I guess I haven’t had the chance to use it in one of my photos that I photoshop. Maybe I should explore more. Thanks and more power.
It is a cool free software. Photoshop is a bit expensive for me given that I need such photo editing rarely.
Thank you for visiting and commenting. Have a wonderful weekend.
Thanks for the tip! I will use Photoscape X cause I find your tip very helpful. The pictures looks wonderful and it didn’t look like cheap photos. You can be a professional photographer in a jiffy thanks to the app!
Definitely, the app is cool and it is free to use. Thank you for visiting and commenting.
Thanks for this tutorials. I always having difficulty in editing my pictures. I will surely try this and practice it.
Glad to know that you found this post informative. Have a wonderful day.
You can also use a lot of apps from playstore or app store like photogrid. It’s so easy to use specially for moms out there that aren’t experts when it comes to photo editing.
Thank you for the info about photogrid. I will try this. Have a wonderful evening.
Thanks! That was really helpful, I was struggling to do this on gimp but it wasn’t working at all, haha.
Cheers!
I am glad to know that you found what you needed. Gimp have excellent features too.
Thank you for visiting and commenting. Have a wonderful Sunday.
Finally, I found what I am looking for! Great guide!
I am happy to know that you liked the post. Thank you and have a wonderful weekend.
Learning in Progress.Love the outcome of the photos.I now know how to produce amazing photos. Would try this for a photo post on my instagram page.
Honestly, I never thought I could find this kind of information in this blog. I joined the community only a few days ago and I have had so many good surprises! Congratulations. I love photography and until today, I never found an easy way to have this effect on my pictures. Thank you so much.
I am so glad to know that you found this post. Thanks for your kind words. Have a wonderful week ahead.
Hi, I didn’t know there is a software to blur our pictures. I like how a picture looks after we use such a software, I’m not a good photographer either so I mite start to use it in the future.
Thanks for sharing!
You are welcome! I am happy to know that the post brought some new info. Thank you for visiting and have a wonderful weekend.
If you’re using a mobile device to take pictures, there’s a simpler way to blur out the background. Download SnapSpeed by Google from the Play Store (it’s completely free) and takes up very little storage space. All you need to do is
1. open the app
2. select a photo by tapping on the open button on the upper left corner
3. Click the lower button in the bottom right corner
4. Scroll down to filters and select lens blur.
5. You can now choose the portion you want to blur out.
Wow ? that is awesome. I will try this with my phone. Thank you for providing detailed info. Have a wonderful evening.
Different strokes for different folks. My issue is changing dates on my photos. I have struggled to the bone to do it but there is something I do wrong and so I get back to square one. I insert everything that is required of me and then I click ok but I see the same date!!
I am giving you an idea for your new blog (lol)
Haha ? thanks for another great topic. Have a wonderful day.
This is actually perfect. I love taking photos with my mobile phone and I have so, so many. I have always wanted to learn a bit on how to modify them but I am a bit too ”dumb” when it comes to this new software. You made it all sound so easy even if I am a beginner! Thank you so much, I will try out the suggested PhotoScape X and see if I manage to produce anything that’s similar to your work 🙂 very useful information.
I am glad to know that you found this post useful. Thank you for your kind words. Have a wonderful day.
This is a great guide for anyone, whether a pro photographer or an amateur! So useful 🙂
Thank you for your kind words. Have a wonderful week.
I’m also a fan of the iPhone micro thingy haha. I don’t really know a lot about photography but I am a graphic designer and have had to blur background a lot. I usually use fireworks to do so but I recently found that the blur effect on the windows 8.1 photo app really works well and easy.
Awesome! Readers of this post will find your comment useful. Thank you for providing the information on blur effects. Have a wonderful day.
Thank you for sharing. I will give this a try. Hubby and 21-year old son know how to use other fancy photo editing applications and even for video editing but I have to patience to learn. 🙂
Haha. I am very glad to know that you will give it a try. Thank you.
I found PhotoScape several years ago and have been very happy with it. Thanks for sharing this great tool with us 🙂
I am glad to know that you already using it. I definitely agree with you; it is a great software. Thank you for visiting and commenting. Have a wonderful weekend.
Thank you. This is quite helpful.
Glad to know that you found it useful. Thank you for visiting and commenting.
I find that some of my photos appear on the big screen with a blurry background automatically, without doing any effort! Usually, when I don’t want any blur at all. 🙂 I must be talented or something… Thanks for the info!
Haha! 🙂 No doubt that you are talented. You are an expert too.
My camera is too primitive to realize focus and distinguish the background! 🙂 Have a wonderful evening.
He, I have that problem too.
Hi…! I assume this is the wife? ?
Once I was crazy about blurring background using Snapseed in my iPhone.
But if you didn’t do it carefully, you will overdone it. All the objects with the same distance to the camera will either blur or not. If you use any lens with high aperture, and you have enough distance for the focused object and its background, you will have blurred object. If the aperture is higher then the background will more blurred. This is called as “bokeh”, a term from Japan to refer a blurry background.
If you live close to me, I will lend you my dlsr and start shooting together. ?
Have fun!
Hi, this is the Hubby. I am so glad that you wrote your expert comment here. I absolutely agree. Sometimes I overdo the blurring thing and the photo looks artificial. You are right, making parts of a photo blur requires careful crafting. I wish we lived closer to you. You could teach us a few tips with your dlsr if we were close by. Many many thanks for visiting and commenting. Have a wonderful time.
Wow, Look great!! Thank you for sharing. 🙂
Glad to know that you liked it. Have a wonderful day.